Learn how to install the latest version of NopCommerce.
First, you will need to download the nopCommerce latest version from their website. Make sure you select the package without the source code. To download the file, you will have to register as a user, fill in the details, and verify your email.
After logging into the Plesk control panel, navigate to and click Files in the side navigation bar.
Find the 'httpdocs' folder from the website directory and click it.

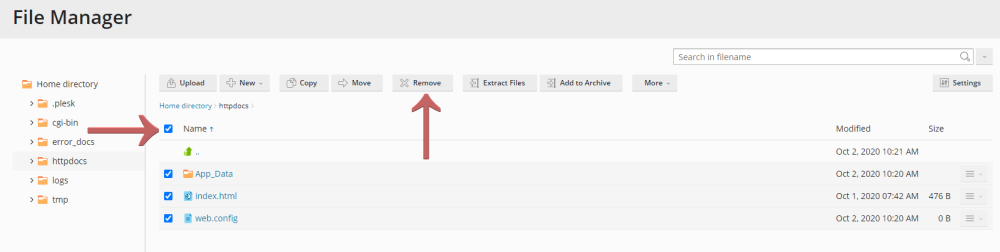
Clean out all placeholder files in the 'httpdocs' folder using the File Manager. You can do that by clicking on the checkbox, as shown in the picture down below, that will select all the files. Then press the 'Remove' button at the top panel. It will ask if you are sure that you want to permanently remove the files, press the 'Yes' button there.

The next step now is to Upload the nopCommerce zip file that you downloaded from their website. Make sure that you are in the 'httpdocs' folder. Click on the 'Upload' button and select the file from your computer, then wait for the process to finish.


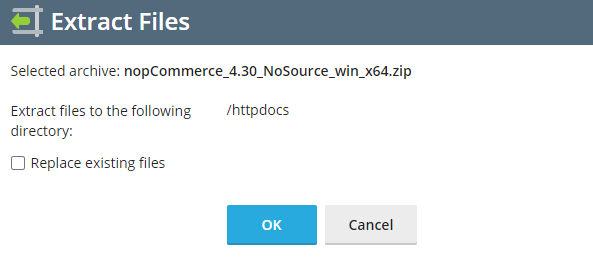
After you have completed the last step and you see the zip file installed on your 'httpdocs' folder, you need to extract it. You can do that by selecting the file with the checkbox to the side of it and then click on the 'Extract' button. A pop up will show detailing the operating that you are going to do, click on the 'OK' button, and let the process finish.

Now you need to give the user permission to read and write in order to continue with the installation. You can do that by navigating to the Home Directory, click on the top of the directories section.

Find the 'httpdocs' folder and look at the right side for a 'downwards arrow.' Click on it and select 'Change Permissions.'

After clicking that, you will see a list of 'Group or User names.' To the right of that list, you have the permissions for the selected user.
Select the user that you want to change the permissions to by clicking on their name. At the permissions sector on the right, check the boxes under the Allow or Deny section to set the permission accordingly. Then press the 'Apply' button.

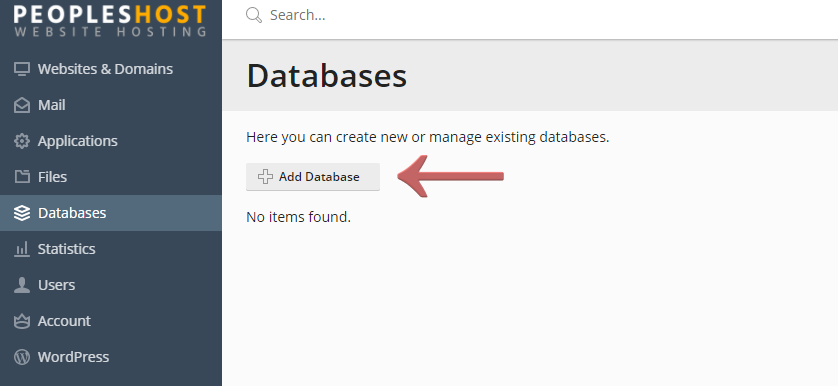
Navigate to Databases from the side navigation bar. Click the 'Add Database' button.
Fill in the required information but remember to change the database server to the SQL Server. You can change the server by clicking on the down arrow, as shown in the picture below. When you have filled all the required information, press the 'OK' button at the bottom.

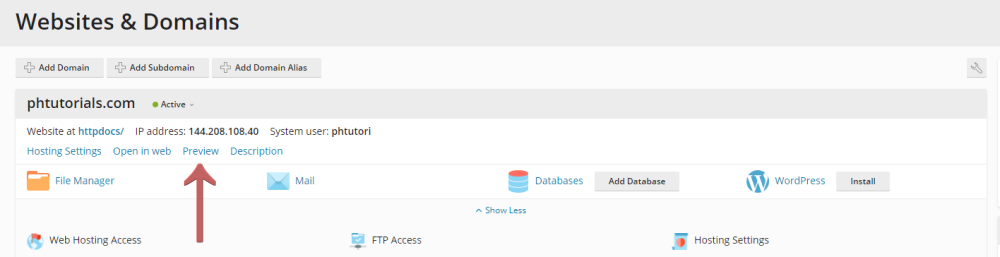
Navigate to Websites and Domains from the side navigation bar. Click on the Preview link in your domain section.
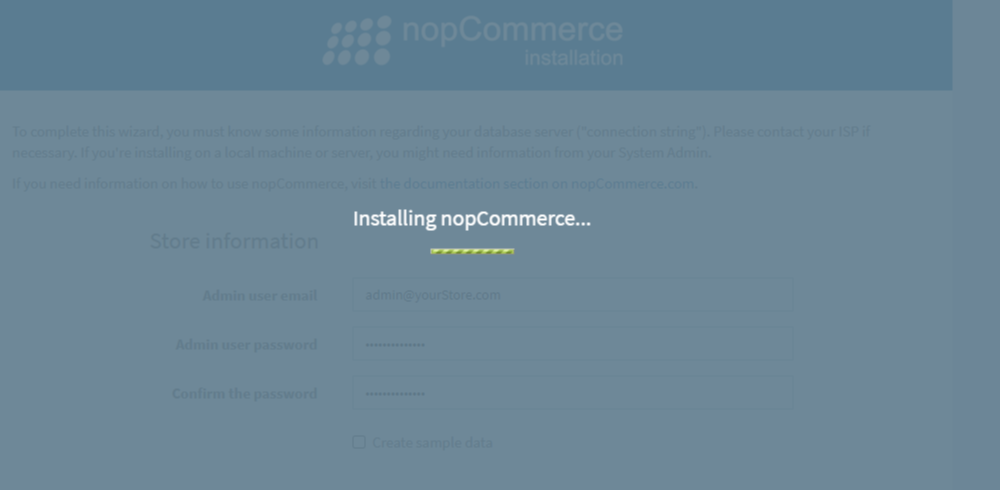
You will see the nopCommerce application installation routine.

It will require you to enter store information and also the database information. After you have done that, click the 'Install' button.
That's all there is to the installation of nopCommerce, you have now successfully completed it.
Looking for reliable Windows hosting with Award Winning Customer Support?
Grab your hosting today with a 20% discount. All plans come with our 60 Money Back Guarantee!
Check out our plans & promotions on our website -- https://www.peopleshost.com/
