In this article, we will look at everything there is to manage the plugins of your WordPress website with the WordPress Toolkit. From installing a plugin, uploading a new one, and doing everything possible with this section of the WordPress Toolkit. Just remember these features are only offered on the deluxe version.
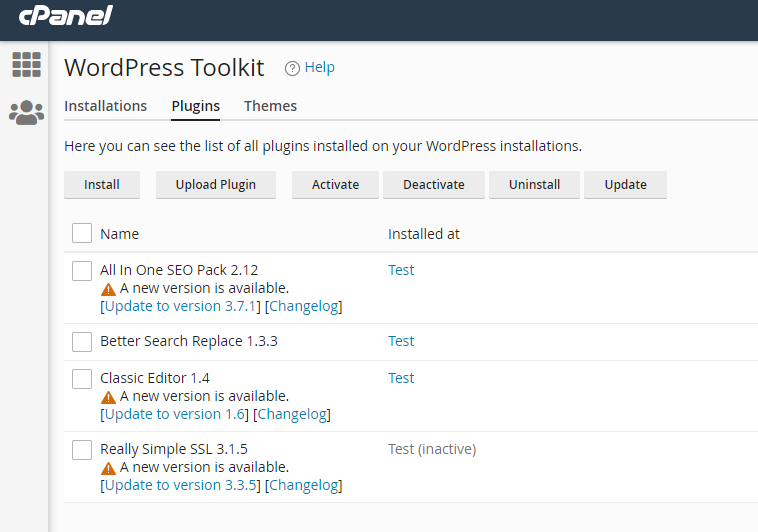
After you have logged in to your cPanel Dashboard, press the WordPress Toolkit application, and click the Plugins tab at the top. Then you will be on the main page where you can modify the plugins.
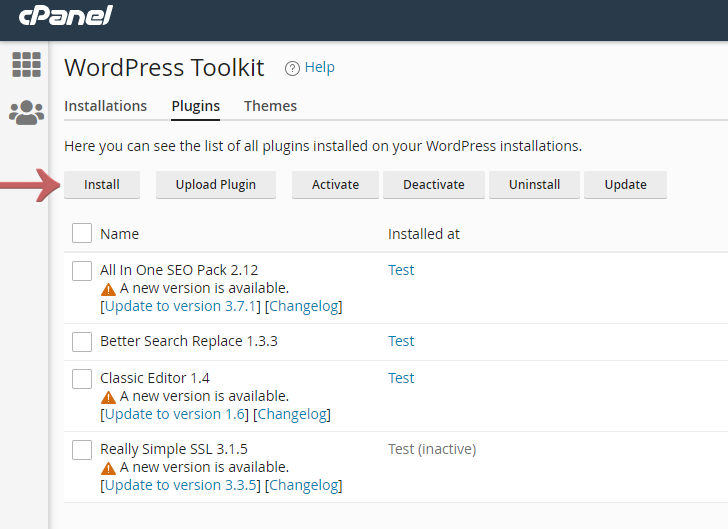
Let’s start with Installing a new plugin. The first thing that you need to do is to press the ‘Install’ button.
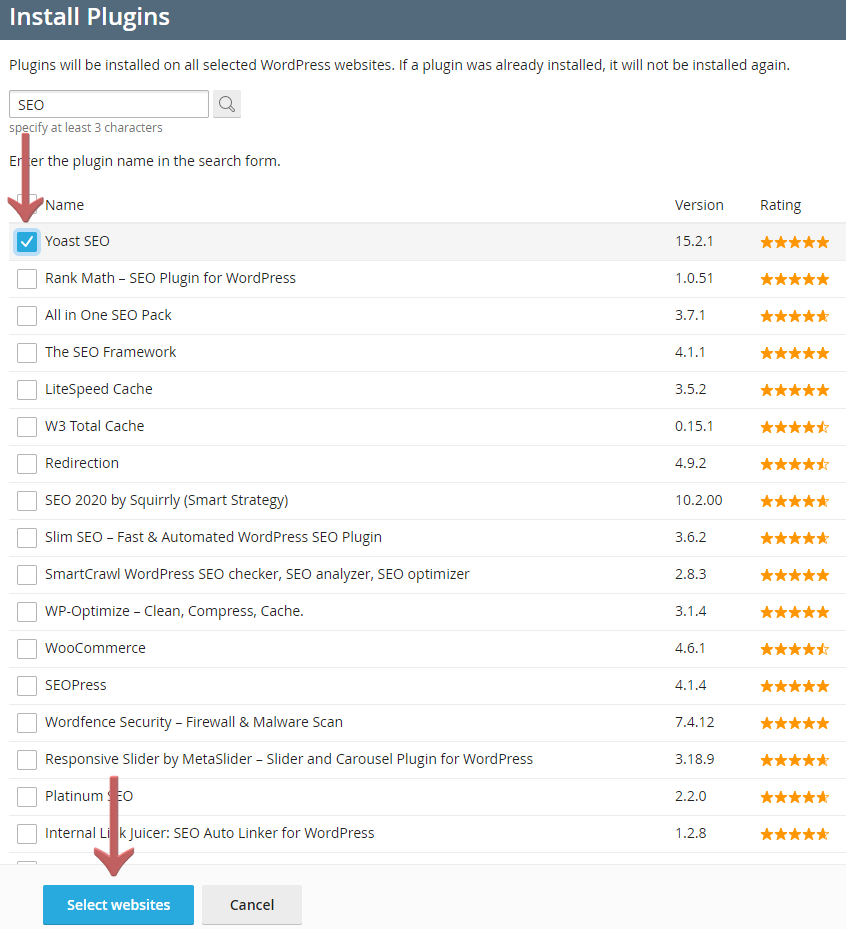
After pressing that button a sidebar menu will appear from the left. You will have a text area where you can insert the name of your plugin, to finish the search press enter or click the icon to the right of the text.

After finding the plugin that you were searching for check the checkmark next to it and press the ‘Select Websites’ button.
When the next form loads you will have a list of available websites from your hosting account that you can choose from. Select the website that you want the plugin to be installed by checking the checkbox next to it. If you want the plugin to immediately be activated after installation check the checkbox below as shown in the picture.
To finish the process press the ‘Install’ button at the bottom.

After you have pressed Install wait until the process finishes and you will see the new plugin populate the list.
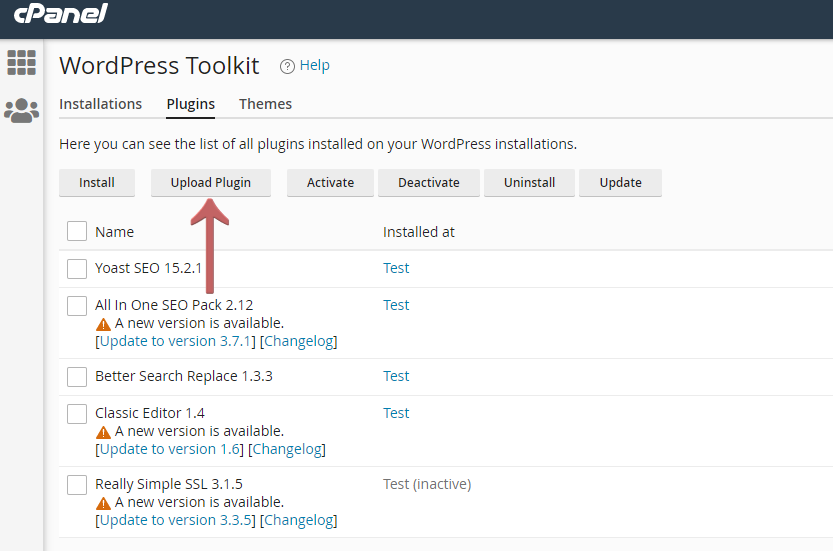
If you want to upload a plugin by yourself, which happens in most cases when you buy a premium or paid version, you can do it by pressing the ‘Upload Plugin’ button.
After pressing the button a sidebar menu will appear from the left. There you will be able to select the plugin file by pressing the ‘Browse’ button. You can select the website that this plugin will be installed by checking the checkbox at the side of the domain.
Last but not least if you want the plugin to be activated after installation check the checkbox as shown in the picture.
Then press the ‘Ok’ button.

Then you have to wait until the plugin gets installed and it will populate the list.
To Activate, Deactivate, Uninstall and Update a plugin is as simple as checking the checkbox beside their name and pressing the respective buttons. For the uninstall option it will show a popup asking if you are sure to remove the plugin, press Yes to finish the process.
If you have any issues with WordPress Toolkit, please contact support for further assistance.
Don't have the feature you are looking for within the cPanel Toolkit interface? Upgrade today within your billing account or simply contact support.
Looking for reliable WordPress Hosting with Award Winning Customer Support?
Grab your hosting today with a 20% discount. All plans come with our 60 Money Back Guarantee!
Check out our plans & promotions on our website -- https://www.peopleshost.com/
