Often times when migrating from one provider to another, you'll find yourself unable to transfer actual emails.
This may happen if you are moving your account from a provider that doesn't use cPanel/WHM, or if your transferring from a Linux hosting account to a Windows hosting account or vice versa. Alternatively, this process is a great way to just backup your email account locally if you have important emails that you want to make sure not to loose.
Things to keep in mind when considering this process.
- You'll need to confirm that your old email account has IMAP access because as the name implies, we are transferring all the emails via the IMAP protocol.
- Do NOT delete the old source email account on your old provider befor you know 100% that the restore was successful on the new server.
- We've found that some mail servers don't allow the automatic restore of the entire account and that you'll need to restore each folder individually.
The first that you'll need to do is download and install IMAPSize from their website here (link opens in a new window). Once you have IMAPSize downloaded and installed, open the software and you'll be presented with the following screen.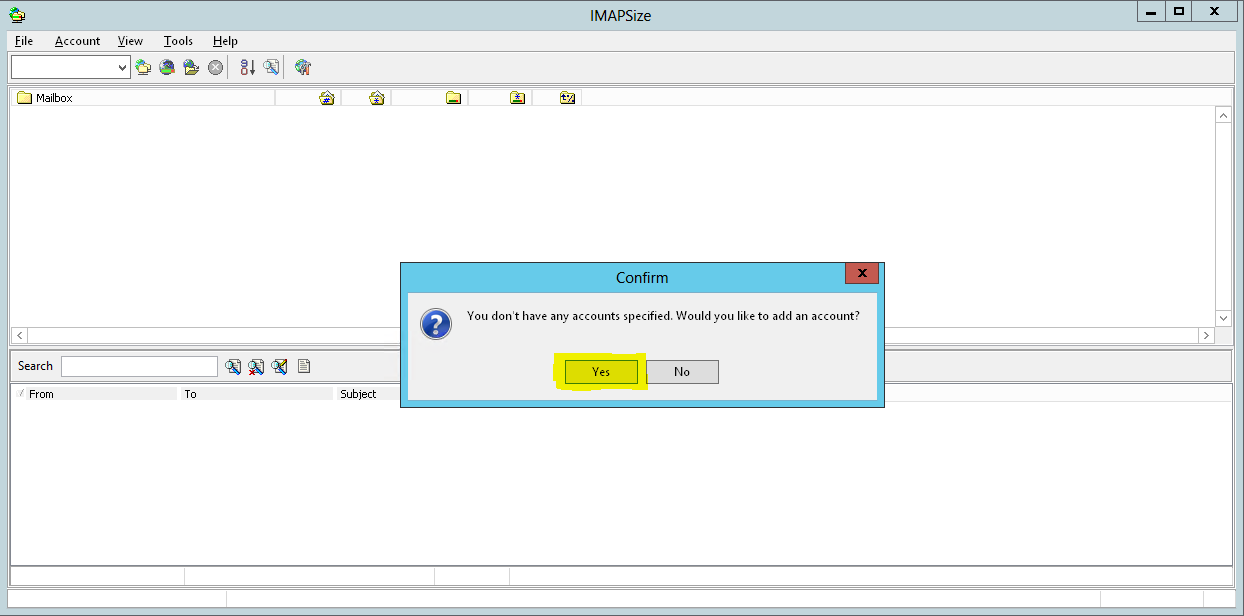
Click Yes, and setup the old source email account with the credentials your hosting company gave you. It's recommended that you use the server hostname for both source and destination to make things clear as to avoid confusion. You can use the Smart Inbox feature if your old provider supports it. More information and FAQ's on IMAPSize can be found here (link opens in a new window).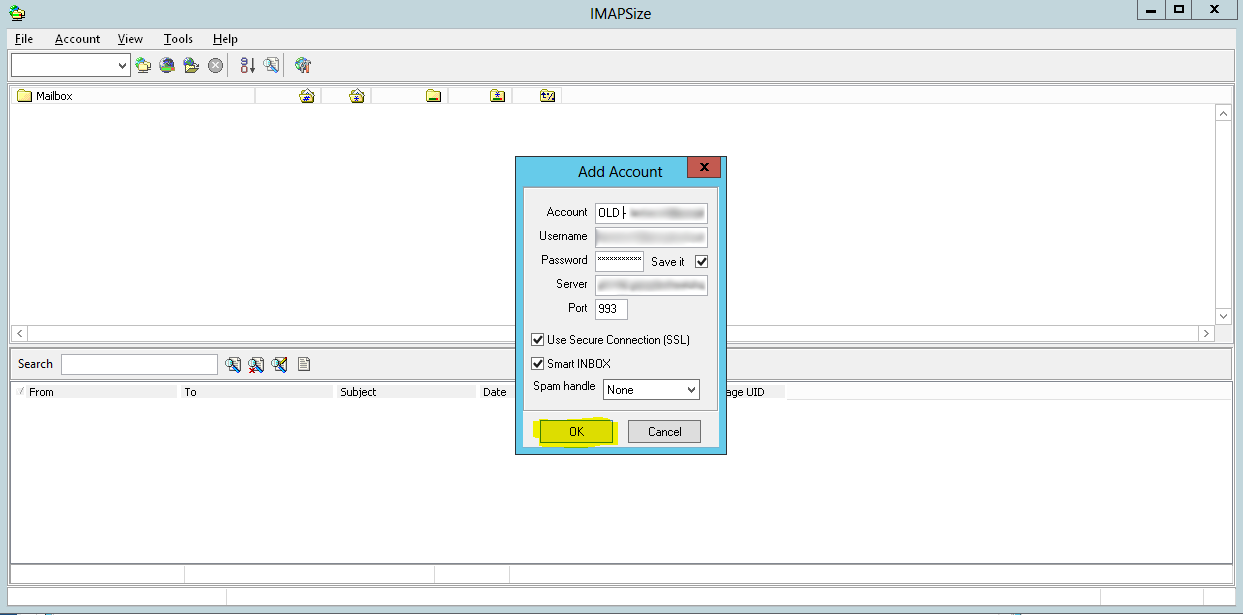
Once you've added the account, you'll want to "Check Size" of the account to make sure all settings work and that IMAPSize is going to be able to grab all the emails from your old account. If you encounter any errors, check the IMAP settings of the old server. You may need to disable SSL, or Smart Inbox, or possibly change the port. Trial and error usually resolve this step quickly.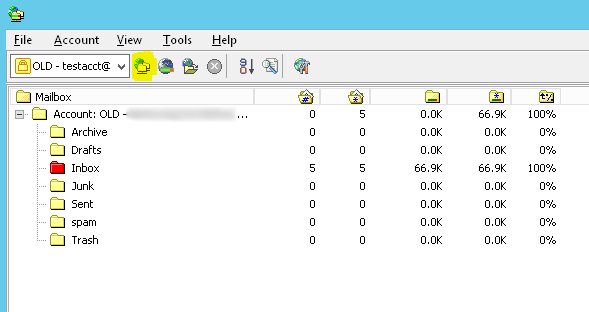
When all settings are correct and you can see all your emails and folders. Click on the Backup icon or use the hotkey CTRL +B to start a backup of your old email acount. Make sure you select all folders using the Select All button.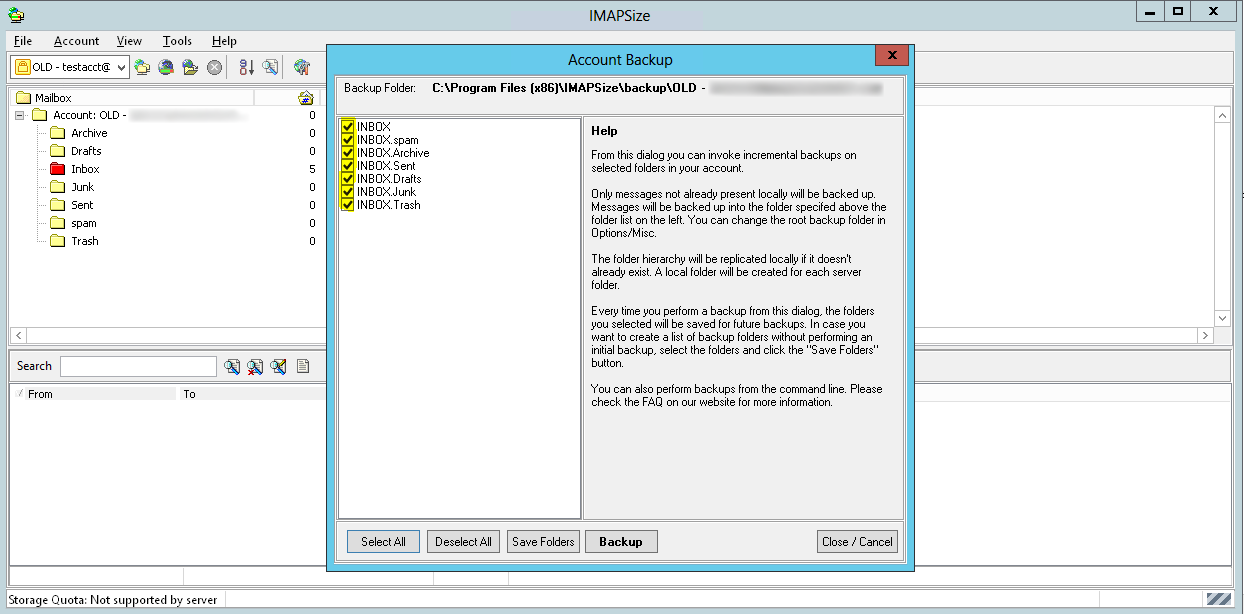
Once the backup completes successfully, you'll see a message indicating such.
Now that you have a sucessful backup of your emails from the old server. You'll need to add another email account in IMAPSize so you can upload those emails to your new account. From the navigation menu, select View > Options, or simply press the hotkey CTRL + O. Click New Account and fill out the IMAP server settings of the new server.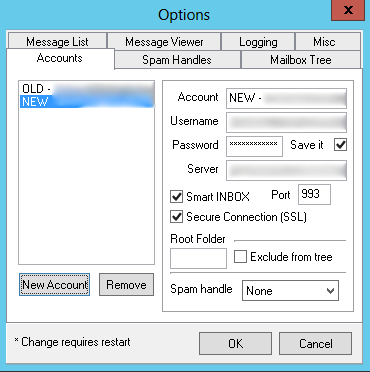
Once the new account is added, make sure you check account size as you did before with the old account just to make sure the IMAP settings are working correctly. If that's good to go, you can now start the restore. From the Account menu, select Restore Backup.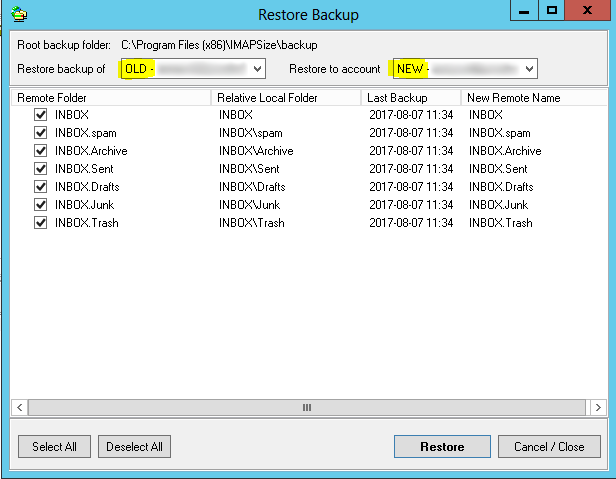
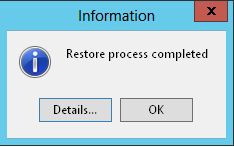
Once the restore is completed, you'll receive a notification completion.
That's it!
If you are switching servers, once you update the DNS for your domain and email starts coming to your new server, you'll see all new emails and all the old emails you just transferred.
Additionally, if you have any issues with this process, please contact support and we'll be happy to help. We do offer to manually migrate email accounts using this process for a small additional fee.
Looking for a reliable Windows or Linux hosting with Award Winning Customer Support?
Grab your hosting today with a 20% discount. All plans come with our 60 Money Back Guarantee!
Check out our plans & promotions on our website -- https://www.peopleshost.com/

