In this article, we'll cover how to properly add an SPF record to your domain in WebsitePanel.
Related Articles:
- How to Create a DKIM Record in WebsitePanel
- How to Generate DKIM in Google Suite (only if using Google Suite for email)
The first step would be to complete the following form on the SPF Wizard website (https://www.spfwizard.net/) where we will generate the SPF record that we will be adding to your domains DNS.
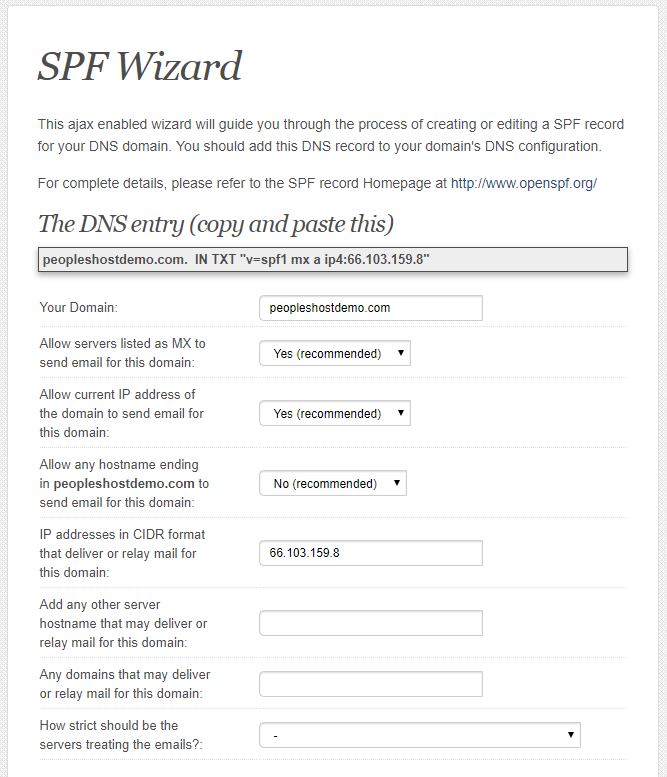
IMPORTANT NOTE: The IP address shown above may not be correct. You can get the correct IP address from your account welcome email. Look for the servers main IP in the welcome email. If you don't know or can't find it, please contact support for further assistance.
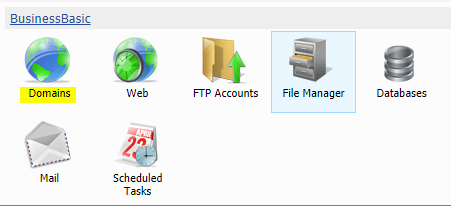
Once you have the form filled out, as shown above, come back here and log in to your WebsitePanel control panel. Navigate to Domains and click on the domain you want to add the SPF record for.
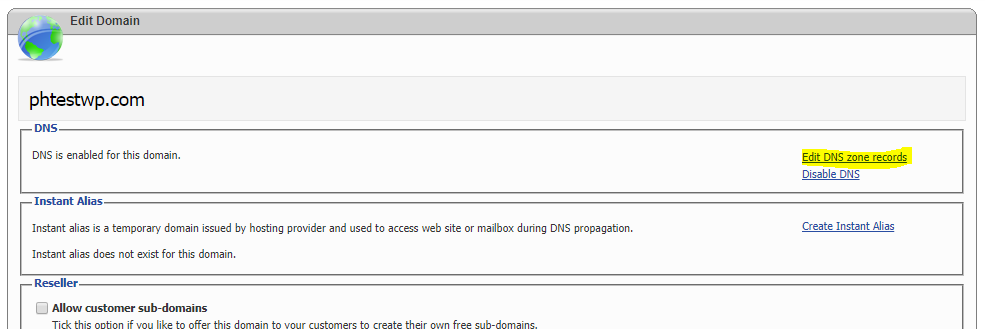
Then click Edit DNS zone records on the right.
On this page, you will see all the DNS records that make your domain work. Be very careful when editing these records. At the top of the page, click the Add Record button.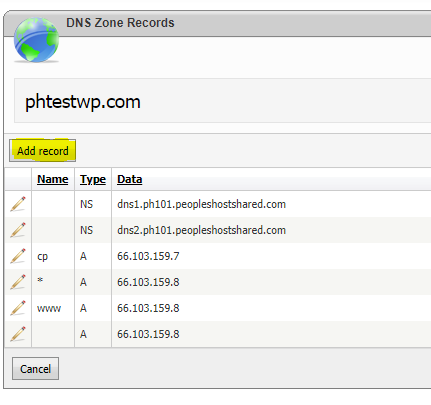
From the drop-down, select TXT record and copy/paste (without spaces) the SPF record from the SPF Wizard website as shown below. Make sure you don't include the double quotes as those are added automatically by WebsitePanel.
Click the Save button to save the newly added TXT (SPF) record. You will need to allow 12/24 hours for the SPF record to propagate throughout the internet. You can check to make sure the record is valid by using any 3rd party tool, however we recommend the following -- https://www.mail-tester.com/spf-dkim-check
If you have any issues, please don't hesitate to contact our support department for further assistance.
Please NOTE: RFC 1035 Section 3.3 (3.3.14) only allows 255 characters per string.
As per RFC 4408 Section 3.1.3, strings longer than 255 characters can be split into several quoted strings.
